

Come see how we built a platform and set up our Department 56 Christmas Snow Village. Come tour this magical Christmas snow village through pictures and a video.
Last year in my Christmas Home tour 2018 I showed you all my village displays in a video. I did love my village set up under the Christmas tree. However, I found that I was limited in how I could set it up.
This past summer we spent some time thinking about a couple of things. Where I wanted to display the village and how I could it could be displayed.
I did some searching on the internet and Pinterest. But I wasn't able to come up with something that would work for my display.
So this lead hubby and I to build the perfect platform for our village.
In order to build the platform, we needed to decide where I wanted it displayed. Took measurements of the area and did a drawing of how it would look.
How To Build A Wood Platform
Headed off to Lowes to buy the lumber.
It always amazes me how much we can fit into my car. A couple of tips I have to keep your car protected when hauling stuff.
I always keep a blue trap in the car. We use this all the time when we take back returnables.
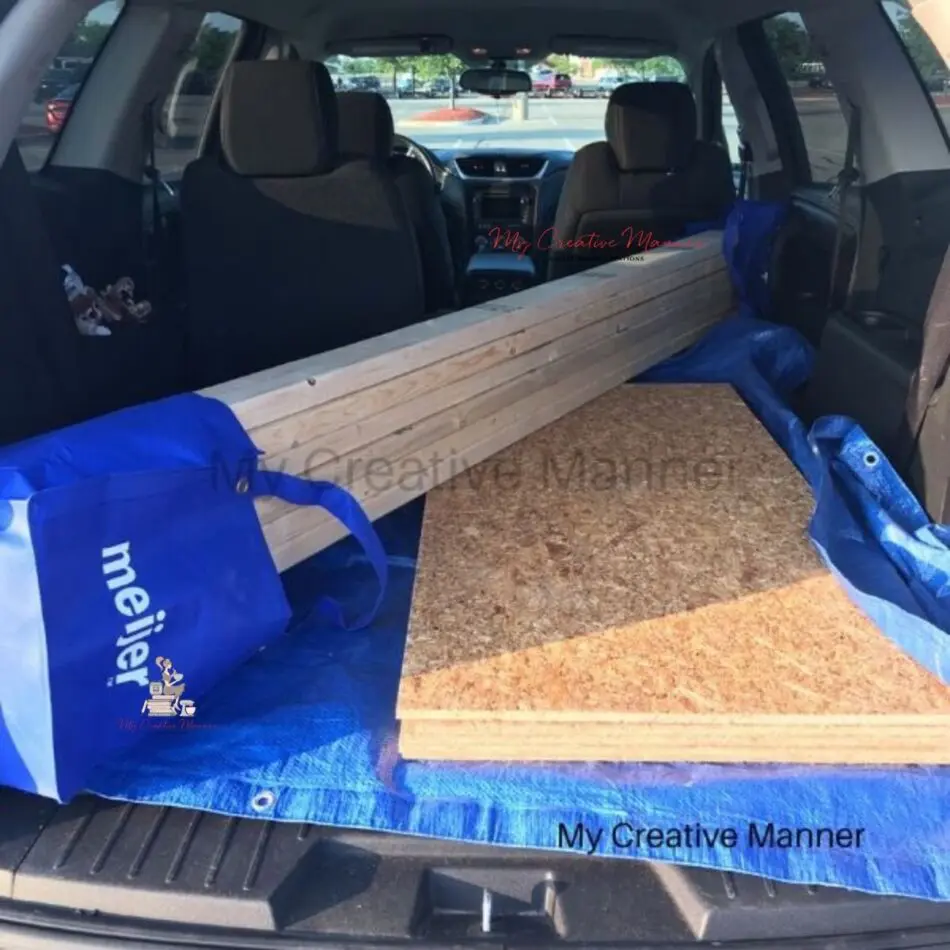
I also keep my reusable shopping bags in the car. We were able to slide the 2x4's into the bags at both ends.
This helped so the wood wouldn't scratch the inside of the car or snag the seats.
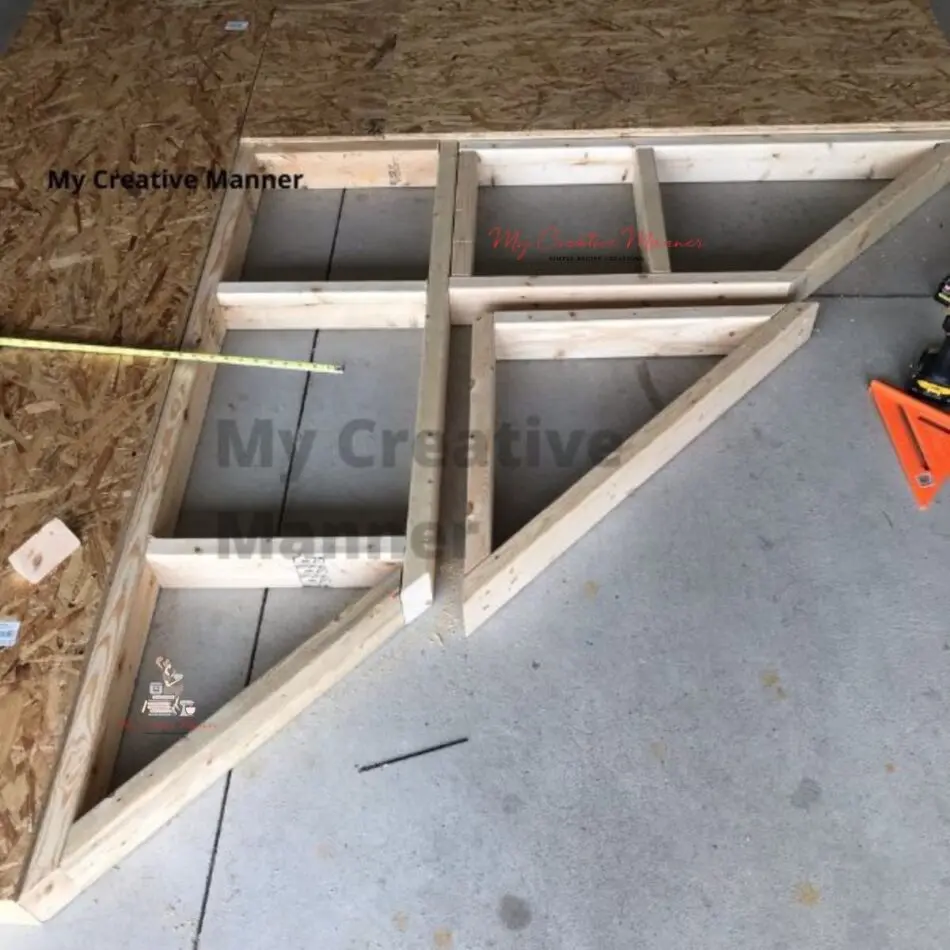
The area where the display will be is in the corner of the living room. So the platform is a triangle shape.
A couple of things that I needed for this platform was I needed it in sections. I wanted different heights to it and I needed to be able to put the light cords under the platform.
Having the platform in sections would make setup so much easier. We labeled each section A-F. Each section is a different size in length because of my wanting different heights.
And because of the location, it would be in the living room. This also helps with being able to carry it.
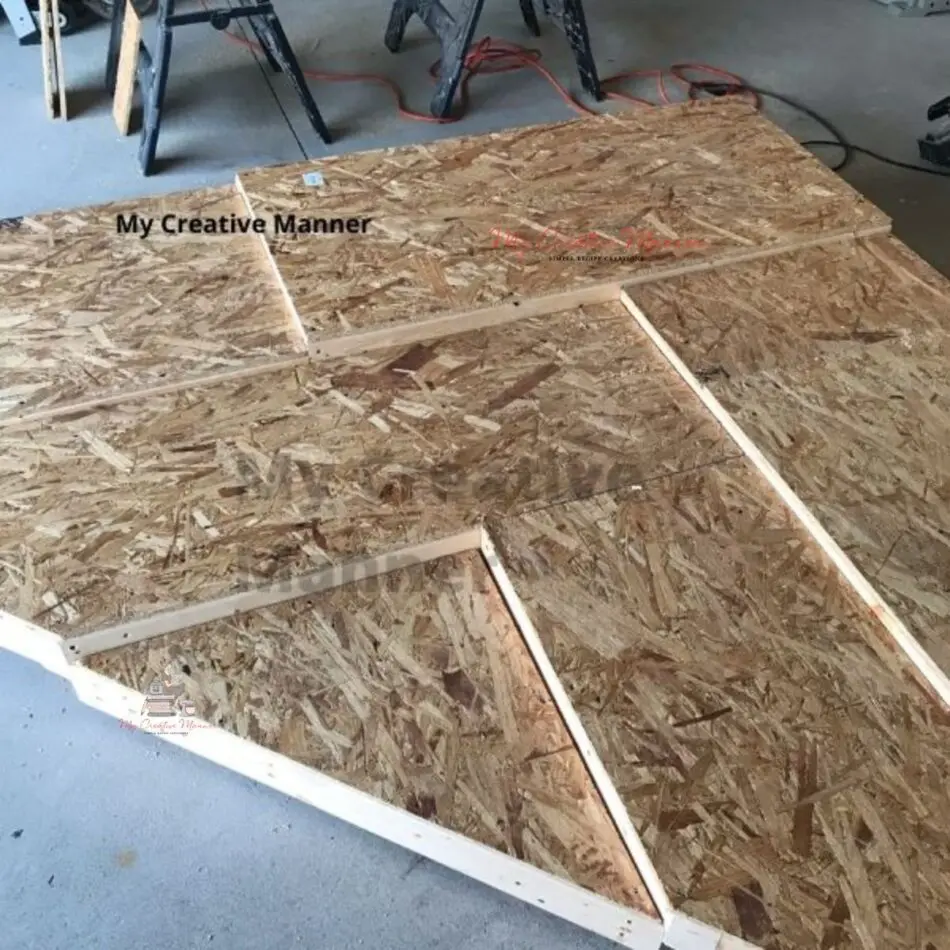
We framed the sections with 2x4's and used plywood for the top of each section. To give me the different heights we cut different lengths of 2x4s to make feet on all the sections but section F. That's the little triangle in the front of the picture.
We did end up drilling holes into the sections so I could drop the cords under the platform. We did that after I did a mock setup in the basement of my Christmas snow village.
How To Setup A Christmas Village

After we built the platform we brought it down into the basement so I could do a mock setup.
This would help me with a few things. The first I was to be able to see where I wanted all the house to be, or at least a good idea of where.
Next would be then I could see where I wanted those holes drilled for the cords. This was one of my biggest wants in the platform.
I want to be able to enjoy my snow village without seeing all the cords.

Once I figured out where I wanted each of the village pieces to go it was time to pack them up. As I packed the village up I placed them according to the section into a box.
In some sections I had more than one box, so I just added what section and that it was box 1 of 2.
As the filled boxes were going back into the storage area, I placed them according to what box I would need first. This would make setup at Christmas time go so much faster.
Christmas Village Setup
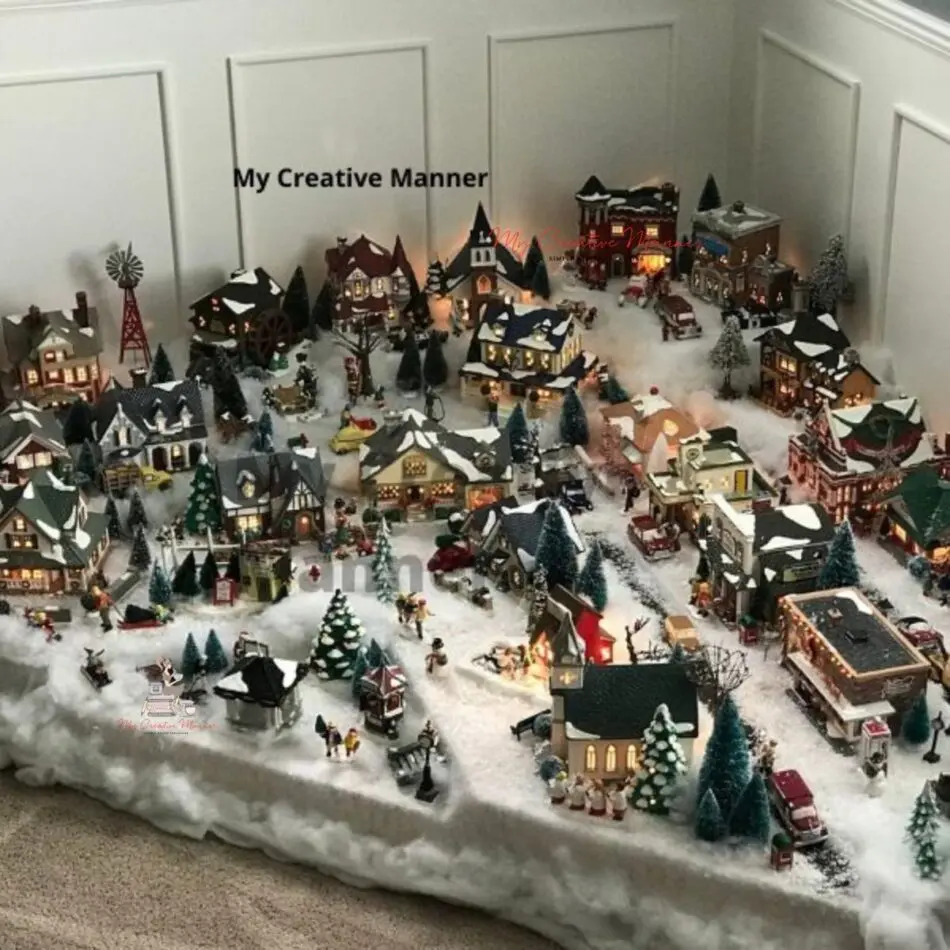
I just couldn't wait to set up the village this year, I started the Saturday after Halloween. This platform worked out so well for my Christmas snow village, and yes it is very large.
Gives me more room for more houses, which after we built it I added five "new" (marketplace deals) pieces.

I started with section A, which is the section that the firehouse is on. I wanted to be able to add more height so I used foam that I had been using in the years past.
Giving the firehouse height would also help hide the outlet that is right there.
For the lighting, since the power strips were going to be under the platform I needed a way to power it on. Hobby Lobby had an indoor wireless remote system.
It offered three grounded outlets with receivers and a transmitter remote which has a working range of 100 feet.
The remote control system was by far the best investment I could have made for the village this year.
On a fun note, the kids have really enjoyed being the one in control of giving the village light.
Before I added any of the houses I made sure to replace the light bulbs in each house. Even though I did this I still had one go out and it's in section A at the back of the setup. So this will be like that the whole time it's up.
Some of the cords for the lights have multiple lights on them. I think one has 5 lights so I can hook 5 houses up and only need to plug one cord into the power strip. I will be adding more of these cords next year.
Finished Setup and A Video
Before I added the light cords I placed quilting padding on the platform to give it the snowy look. I was able to rip a hole in the padding to get the cord to where I needed it.
Having the sections and boxes labeled really helped with the setup. I'm thinking teardown will go as smoothly.
It truly is hard to get a complete picture so I made a video on my Youtube channel that shows the completed setup.
I hope you enjoyed how we set up our Christmas Snow Village. You may also really enjoy my Christmas tablescape as well.
Sharing one creative project at a time~ Jen
Other My Creative Manner projects you may enjoy are:
- Farmhouse Christmas Porch
- Christmas Decorations On A Budget
- Beautiful Fall Black and White Tablescape
- Christmas Tablescape

Leave a Reply