

Come see how I organized a spot in our master closet for my jewelry which lead to making myself a dressing area.
Learn how we made a jewelry wall organizer from antiques and how we framed a cheap mirror.

Necklace Organizer
I have a few obsessions; all things Christmas, collecting salt and pepper shakers, having my kitchen organized, antique shopping, shoes, and my jewelry.
When I do go shopping I like to hit the clearance racks in the jewelry department. Seriously I have found some really cute earrings and necklaces on these racks and not paid much for them.
I started noticing I was running out of room in my jewelry box. I looked all over Pinterest and not really finding what I wanted. Talking with hubby about some of my ideas he said we could come up with something.
A few weeks ago we did a trip along the West Michigan shoreline checking out some antique stores. While we were in one store I was inspired by the arrow hooks that are at the end of this jewelry wall organizer.
I knew what I wanted and every store after that I collected a little something for my board. I just needed a board to hang everything on.
Like I said I like antique shopping and have been collecting some treasures just incase. Now I know what you are thinking I must be some kind of packrat but really I'm not.
In my office/craft room I found this board that was from a barrel. When I bought it I was thinking I would paint something on it but never figured out what I would paint. So why not use that for the jewelry organizer.
Jewelry Display Area In Walk-In Closet

Taking the wood barrel board I decided what hooks I wanted on it and how I wanted them.
The next step was up to hubby, he drilled the holes where we would be placing each hook. Then attached each with the proper size screw. For the hooks, he ended up using nuts on the back of the screws to hold them on.
Our master bedroom closet it ridiculously big. As you walk in the closet the wall on the left didn't have any shelving on it. We only had a shoe rank that could be moved down and some old decor that wasn't being used.
So I figured this would be the best place for my jewelry hanger and to turn this area into a little dressing area.

When I told my hubby that I wanted a jewelry hanger I'm sure he didn't think he would agree to framing a mirror,
Yeah, I like to keep some of my ideas from him and spring them at the last minute.
Framing a Full-Length Mirror
At our local supergrocery store, I bought a $5.00 mirror. We went to Menards and bought rough pine boards that were 3.5 inches wide and 6 feet long. We also bought plywood to attach the mirror too.

The mirror had a plastic frame around it, we carefully removed that frame. Wanting the mirror to be stable because this full-length mirror had some flexibility to it.
We decided that adding a plyboard to the back would help with the stability and also give us something to attach the frame to. So we glued the mirror to the plywood before the frame was added around the mirror.

Since I was after the farmhouse look we just kept the cuts simple and straight.
Once all the cuts were made and it fits like hubby thought it should. I was able to do the staining before we attached the frame to the plywood.

The stain I choose was called ebony, which wasn't really that dark. After I applied the first coat I felt that it was perfect.
When he cut the frame sides he used a router to make a dado to help hold the mirror in the frame.
With the stain dry, hubby put the cut pieces of the frame back around the mirror. Adhering the frame with wood glue and small nails. Adding hooks on the back so we could hang it on the wall.
Dressing Area
My ultimate goal when we started this project was to have a dressing area in the closet.
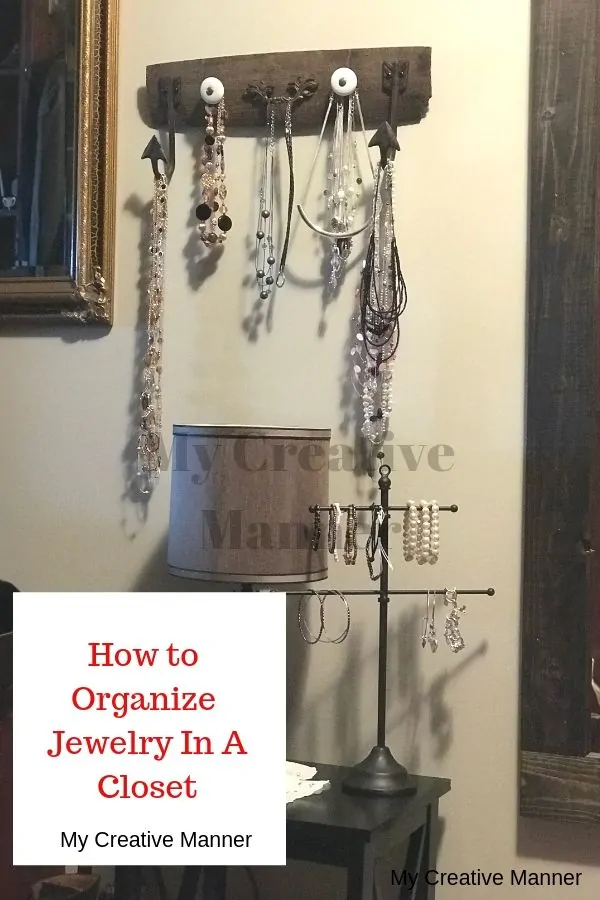
Hubby hung the full-length mirror in an area in our closet that I could stand back from and see all of me. Then next to the full-length mirror is the jewelry hanger.
Knowing that I needed some extra room for those cute bracelets I was on the hunt for two things. I wanted a little table to hold a lamp for extra light and I also wanted a jewelry tree.
Boy did I have a hard time finding what I was looking for until I went into Marshalls.

To finish my dressing area off I added a lamp that we had but wasn't using. Then another mirror that we had previously had hanging in the foyer.
That was hung next to the jewelry hanger. I figured this would come in handy when hubby is putting on his ties.
I'm really happy with how my dressing area turned out. The jewelry hanger and full-length mirror were easy DIY projects and I'm very thankful for my husband's help.
Sharing one creative idea at a time~ Jen
Leave a Reply